iOS Localization Guide
Welcome to the iOS localization documentation! This guide will help you localize your iOS app and make it accessible to users in different languages.
Step 1: Download the App
Begin by downloading the app from the Mac App Store.
Step 2: Select iOS Project
Once installed, open the app and select iOS project.
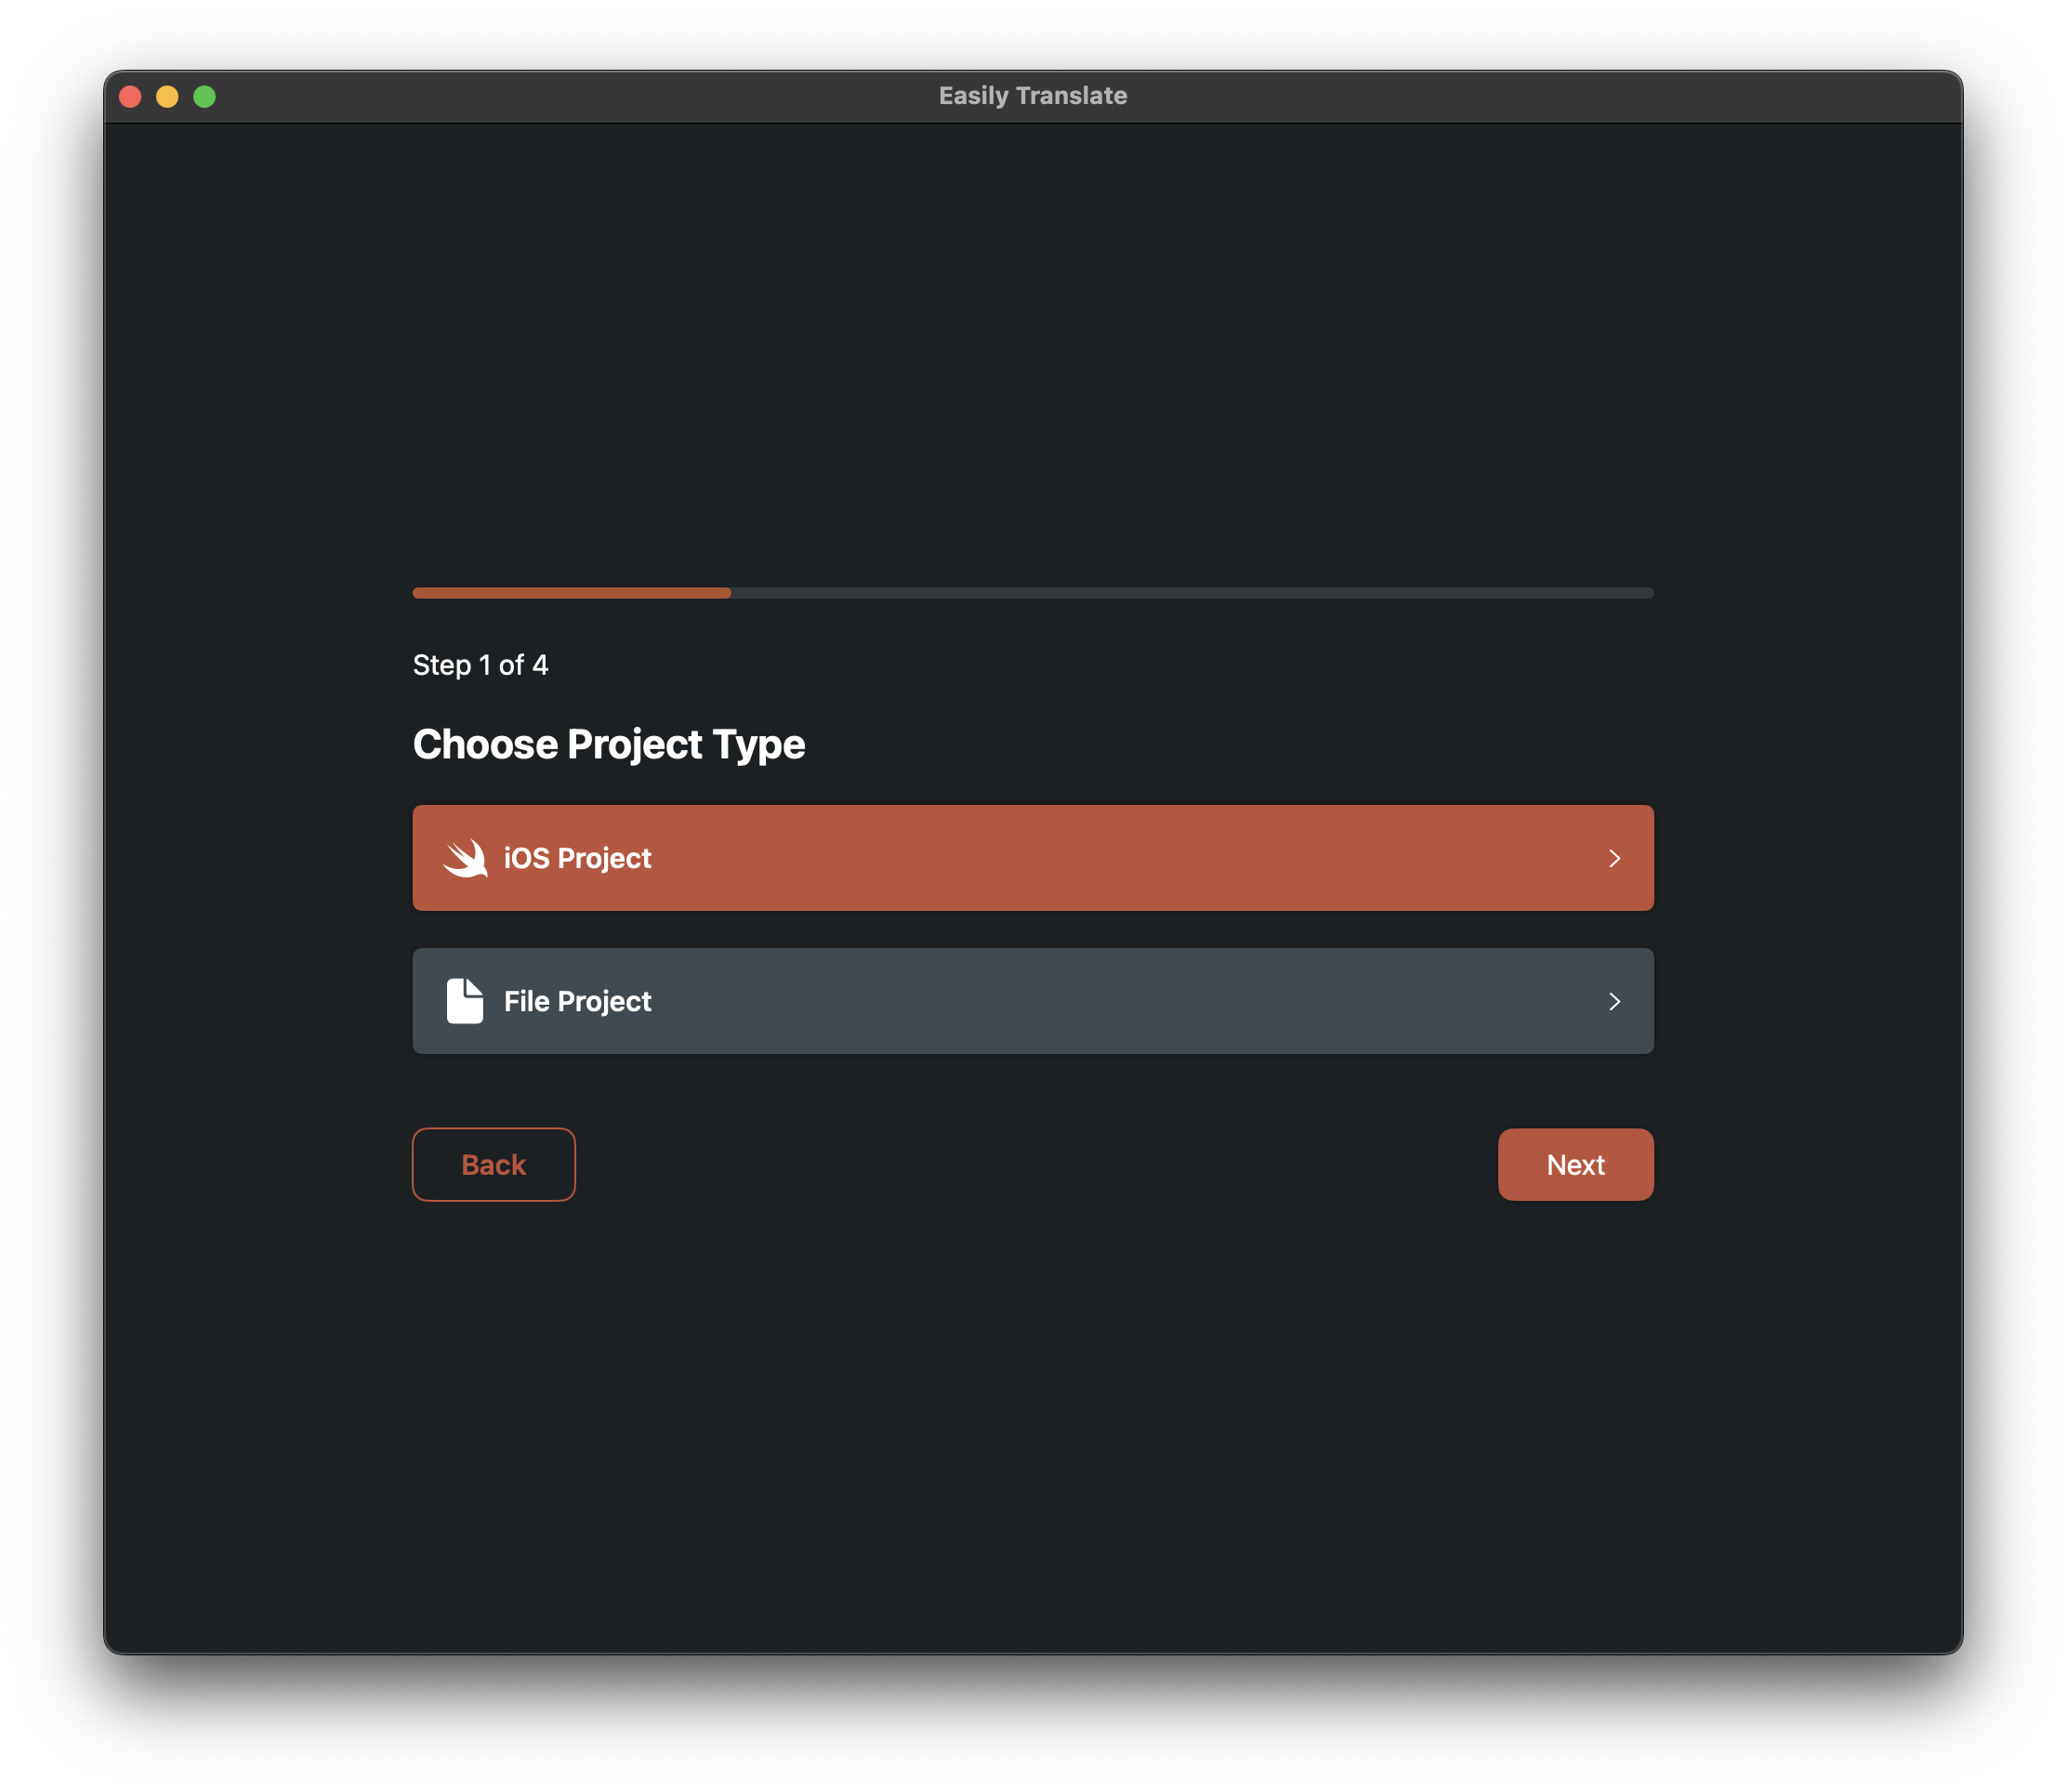
Step 3: Choose Your Project Type
You’ll need to select the appropriate project type:
- Strings (for .strings files)
- String Catalog (for .xcstrings files)
Step 4: Locate Your Localization Files
Select the folder containing your localization files (e.g., Localizable.strings or Localizable.xcstrings).
-
For String Catalog:

-
For Strings:
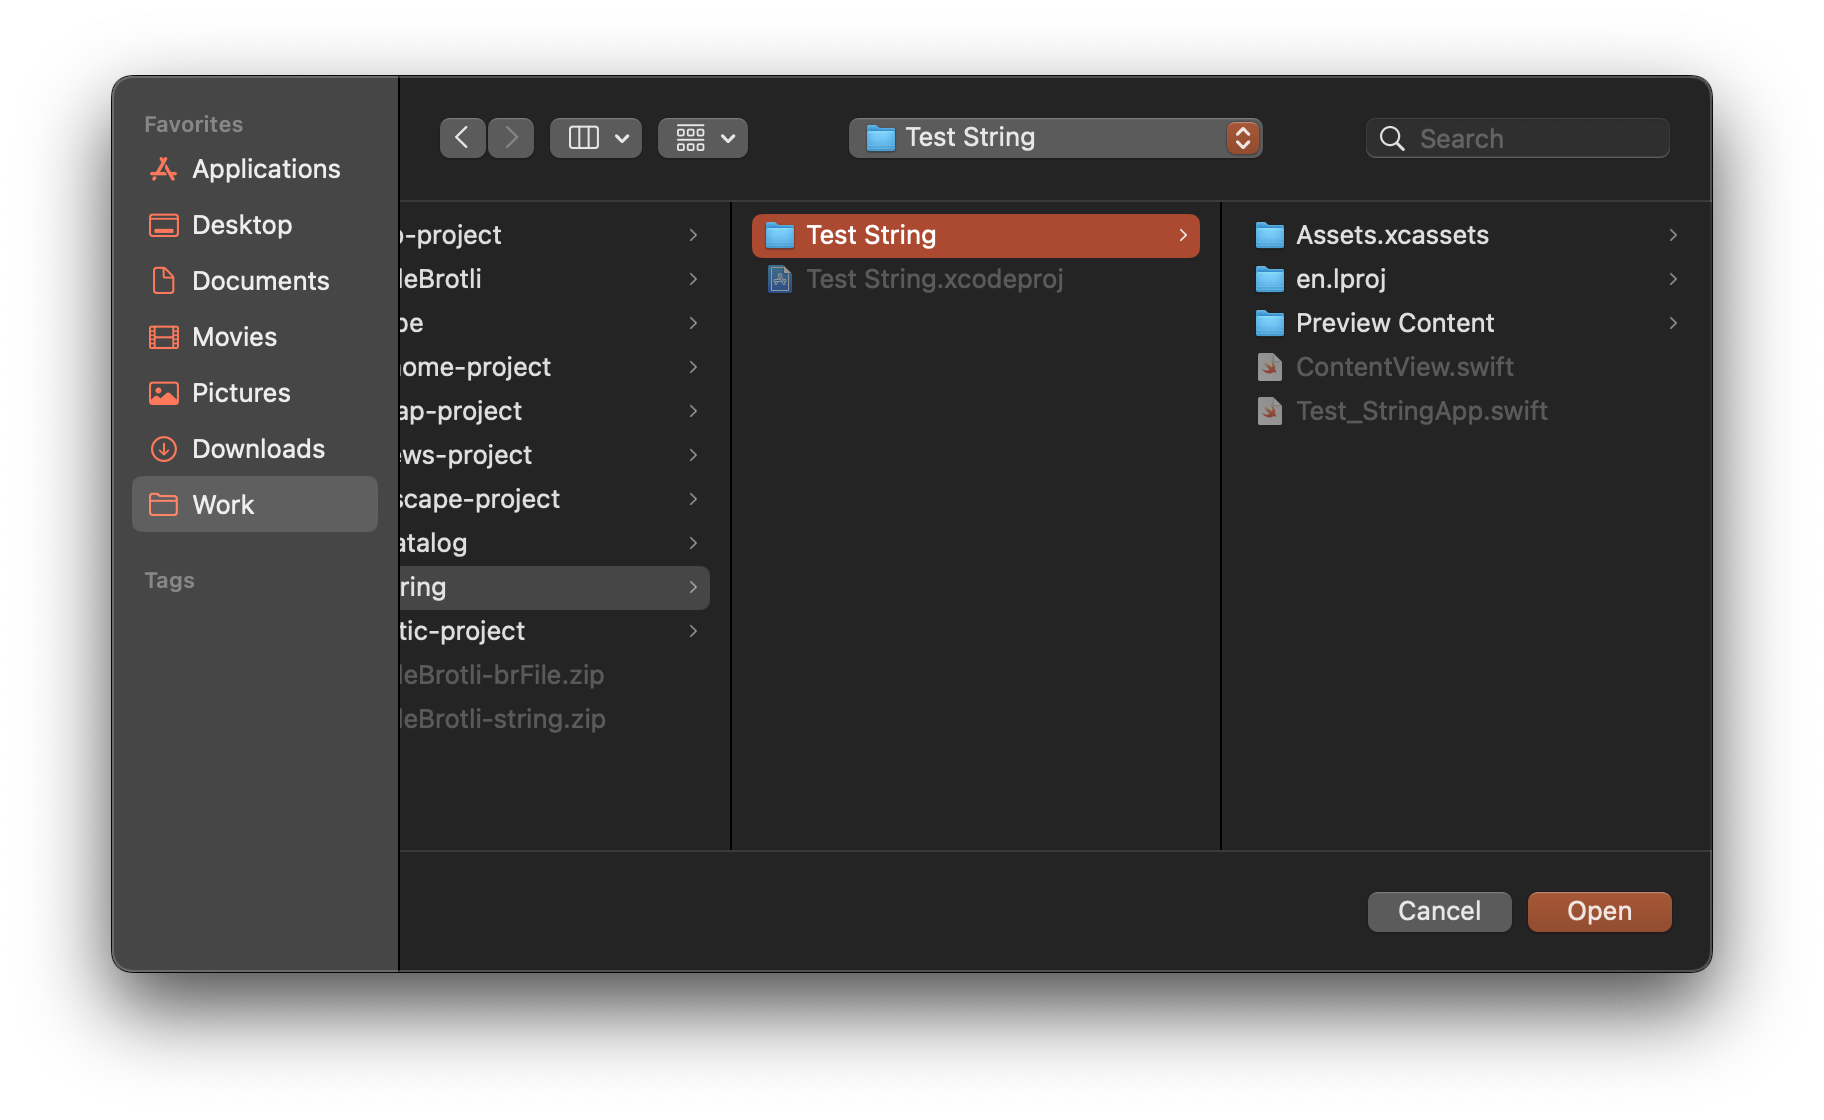
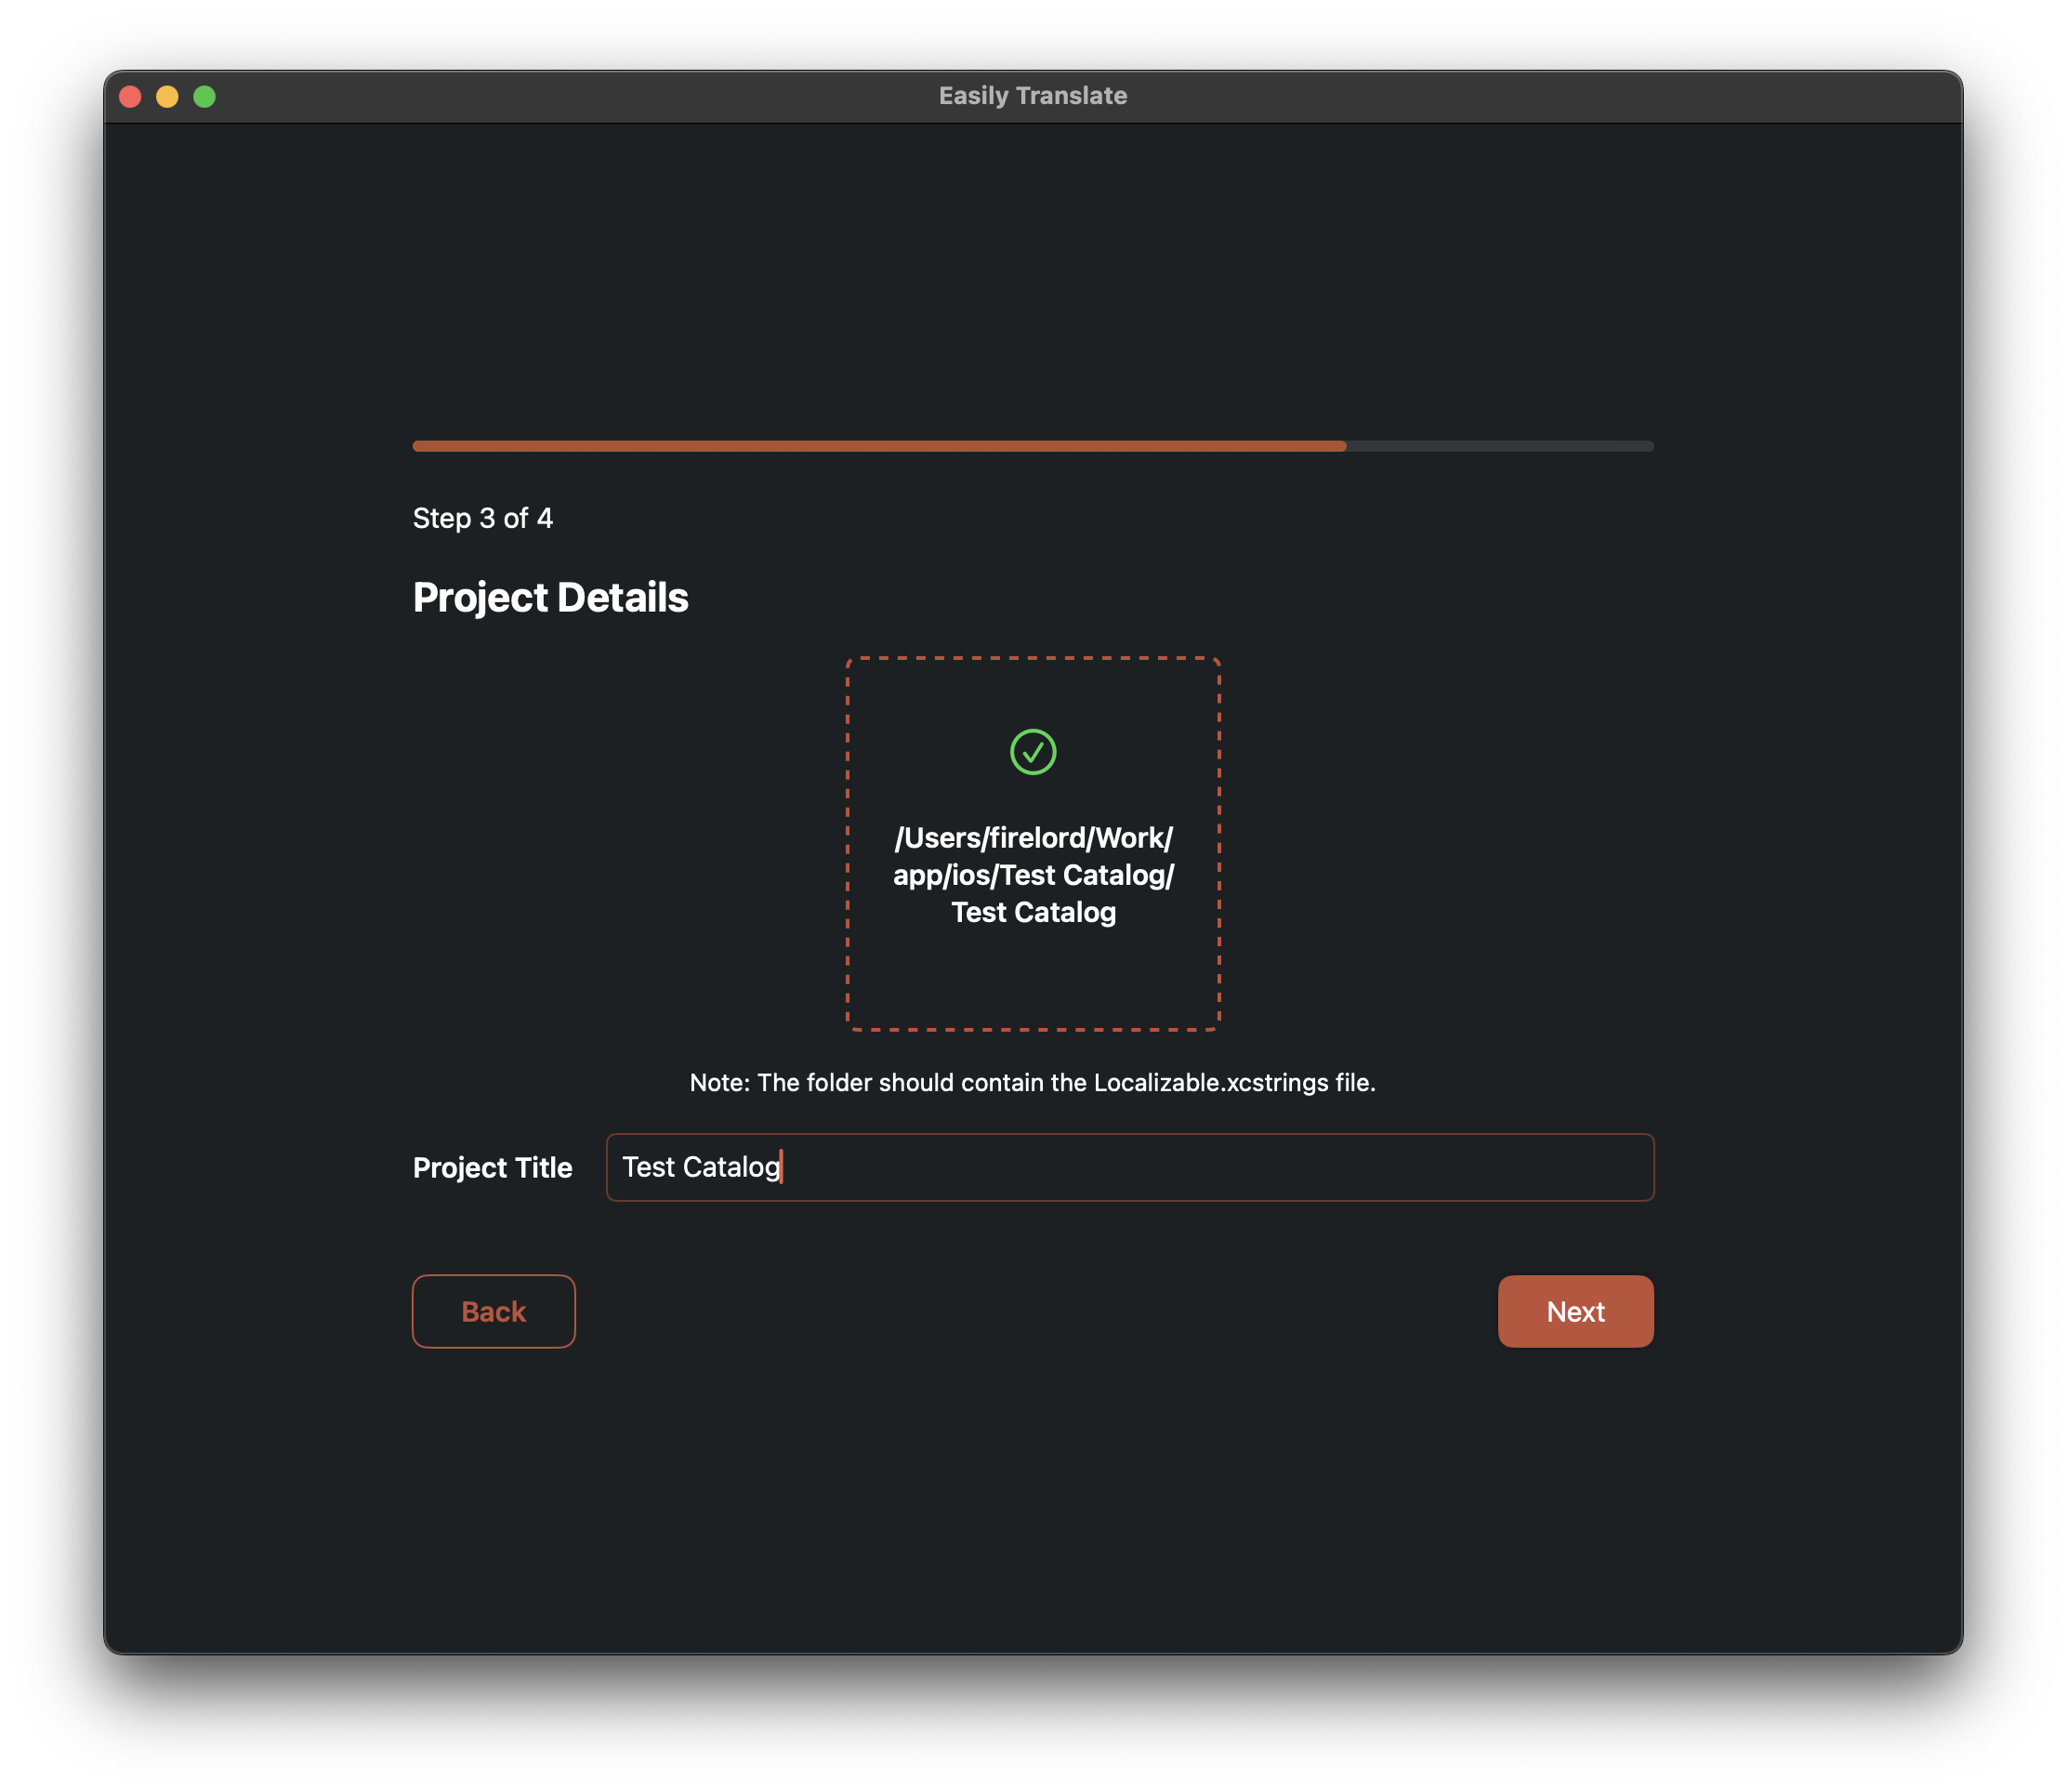
Note: Ensure you select the correct folder, which should contain *.lproj or Localizable.xcstrings files. The folder with these files will be highlighted, and you should see a green checkmark indicating it's correct.
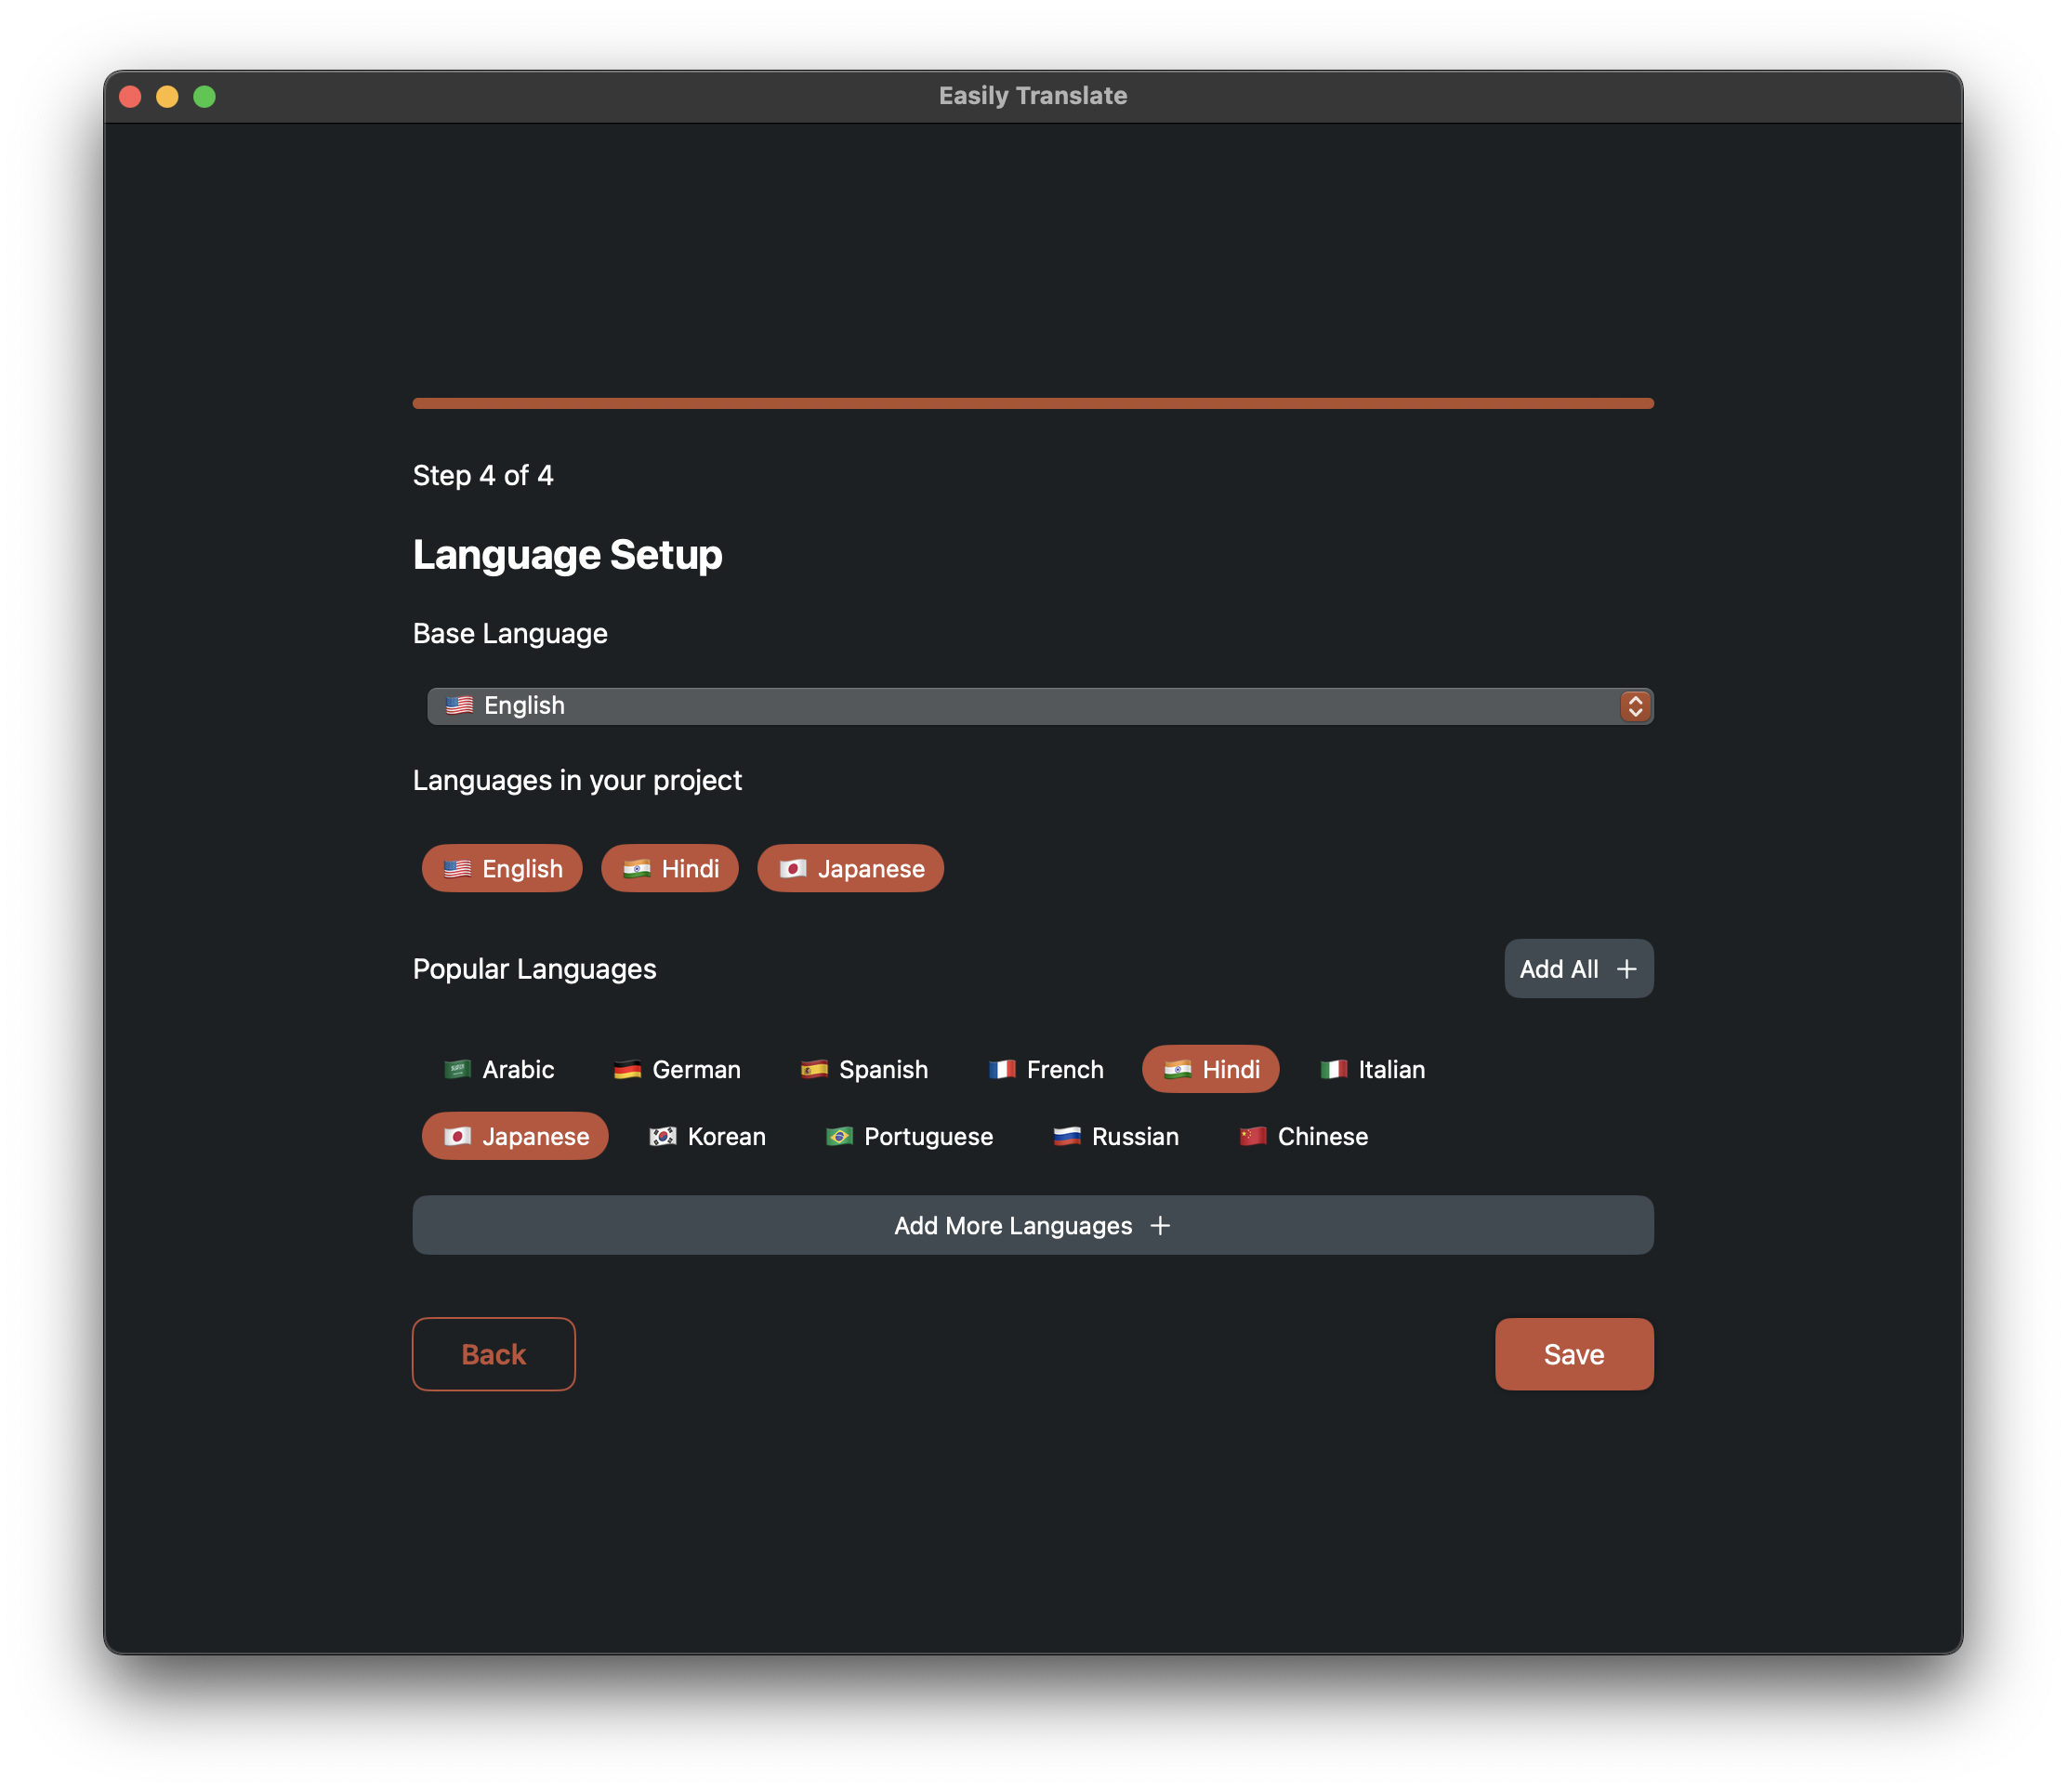
Step 5: Language Setup
Now, configure your languages:
- Select your base language.
- Choose the languages you want to translate your app into. It will also select the language currently available in the app.

Step 6: Translate Strings
That's it! The app will save your project. You can start translating the strings by clicking the Sync Project button. If you want to translate a language that is still empty, simply click the Translate button.